Seeing really can lead to believing – and better understanding. Just look at process mapping, a visual technique for illustrating the sequence and flow of organizational processes. Clear and concise diagrams outline the tasks and subtasks involved and the people responsible for completing them.
By creating a process map, companies better understand how a given process works.
This helps employees complete their jobs more confidently and efficiently and allows teams to pinpoint optimization opportunities. Creating a process map also provides a solid foundation for implementing automation opportunities, which drive continuous improvement and growth.
Why create a process map?
Creating a process map helps enhance teamwork, decision-making, and problem-solving. Other important benefits include:
Improved visibility: Process maps show how tasks and activities flow within your company. This helps executives and managers understand the big picture of how processes work and interconnect, and gives employees a better understanding of their roles and responsibilities.
Enhanced collaboration and communication: By offering a shared visual reference, you ensure everyone has a common language to discuss tasks and understand process expectations and objectives. This fosters collaboration and communication among team members.
Increased efficiency: A process map helps your team easily identify inefficiencies, bottlenecks, and redundancies. Once you address these issues, you can streamline operations to save time and increase your company’s efficiency.
More job satisfaction: Process maps offer transparency, clearly delineating employees’ roles and responsibilities. This eliminates guesswork, helping them feel more confident in their work and boosting their productivity and job satisfaction.
Simplified training: With recognizable colors, shapes, and symbols, process maps are easy to understand at a glance. This makes them ideal for employee training and onboarding. Maps guide users through their assigned tasks and facilitate faster learning.
How creating process maps improves compliance
The best way to understand the benefits of creating a process map is to see an example in action. Let’s look at how process mapping helped one company improve its compliance.
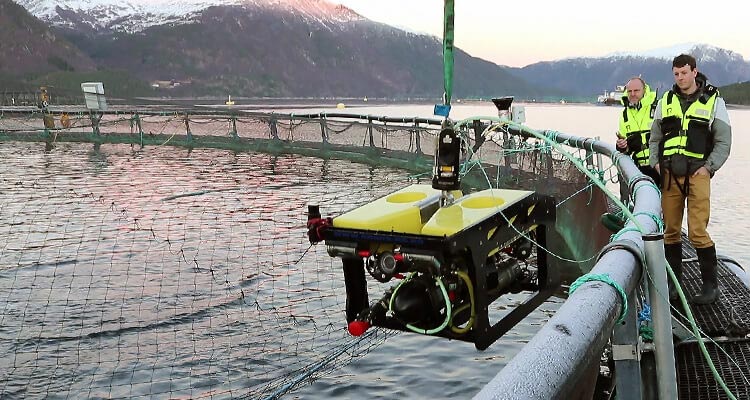
Sonardyne , a UK-based global manufacturing company specializing in underwater navigation and marine technology, needed to improve its efficiency and standardization as it grew. In a regulation-heavy industry, this is no easy feat.
The company adopted Nintex Process Manager as its central platform. As it mapped its processes, Sonardyne re-evaluated the way it worked and created new best practices and common practices to use company-wide. This not only improved its International Standardization Organization (ISO) compliance, but also streamlined its procurement processes and reduced the amount of time it spends training employees.
How to create a process map
Creating a process map gives you and your team more clarity on how a process works. Once you’re ready to build a process map, follow these eight steps for best results:
1. Identify a process to map
Identify a process you want to map using data or input from stakeholders. Consider choosing one that experiences frequent bottlenecks. For example, you may want to outline a product development cycle or your payment receipt process.
2. Set goals
It’s easier to achieve success with a process map if you first define what success looks like. Ask yourself why you want to map this process. For example, you might want to produce a map to reduce new employee onboarding time. Attach specific numbers or percentages to your goals to serve as performance indicators and show you whether the process map fulfilled its purpose.
3. Select a type of process map
Choose a map type that aligns with your goals, whether it’s a basic flowchart or a more detailed workflow diagram. For example, if you want to increase the efficiency of your supply chain’s procurement process, you might choose a value-stream map.
4. Assemble a process mapping team
Process mapping requires collaboration. Involve key stakeholders, such as process owners and managers, to gather specific insights on activities, inputs, outputs, and roles. This collective effort allows for diverse perspectives and improves the accuracy of your map.
5. Identify the steps
Start by identifying the beginning and end points of the process and filling in the remaining steps sequentially. You can document these steps as a list or basic flowchart. Just make sure you include all tasks, events, and decisions and the roles or functions responsible for completing them.
6. Draw the map using symbols
Using your process mapping software, create a formal visual representation of the process using standard shapes, colors, and symbols. Make sure to include information such as triggers, actions, decisions, and stakeholders.
7. Share the map with stakeholders
Once you have a draft of your process map, share it with your team members to ensure its accuracy and readability. Ask your team for input on any omissions or redundancies and make last-minute changes.
8. Implement and optimize
Once you finalize the process map, implement it with a small group to minimize risk to your business. Monitor its performance and get additional feedback from your pilot participants before sharing the map with the rest of the team. Once the map is broadly in use, regularly review data and make changes to encourage continuous improvement.
Types of process maps to create
Depending on its goals, industry, and processes, your company might develop and use one of the following types of maps:
Flowchart
One of the most common types of process maps, a flowchart uses standardized symbols to represent steps, decisions, inputs, outputs, and flows. You can use these charts to depict high-level or detailed processes.
SIPOC diagram
SIPOC stands for suppliers, inputs, process, outputs, and customers, which is exactly what this type of map shows. A SIPOC provides an overview of a process, helping you contextualize it and understand its boundaries. Organizations create these maps for a variety of uses, including product launches, onboarding employees, and understanding customer expectations.
Detailed process maps
Also known as low-level process maps, this type provides a granular view of each task, subtask, decision, input, output, timeframe, and interaction in a process. Detailed process maps facilitate in-depth analysis for process owners and leave little room for ambiguity for the frontline workers who execute them.
Swimlane map
Swimlane maps organize process steps into lanes, each representing a different team or individual. Diverse companies develop these maps to understand roles and responsibilities and visualize interactions and handoffs between stakeholders.
Value stream map (VSM)
Commonly used in the manufacturing industry, VSMs help you visualize the flow of materials, information, and actions to deliver a product or service to the customer. While these maps take time to create due to the level of detail involved, they provide helpful information for identifying process improvements and eliminating waste.
High-level process maps
Also known as macro-level or top-down maps, they offer a broad overview of a process with few specific details. They present the main stages and major interactions between them to help executives with strategic planning and alignment
Elements to include in your process map
No matter what type of process map you create, you need symbols to denote the activities, inputs, outputs, decision points, and flow direction. Business Process Model and Notation (BPMN) 2.0 outlines the most common symbols and how you should use them:
Terminating events: Use circles to indicate the first and last step of the process
Activities or tasks: Select rectangles with rounded corners to represent activities or tasks to complete
Gateways: Use diamonds to show decision points that can change the path of the chart
Flow: Insert arrows to indicate the directional flow between steps
These symbols are similar to those outlined by Unified Modeling Language (UML). The difference is that BPMN caters to business process modeling, while UML has broader applications in complex processes, especially in the software industry.
Best practices for creating a process map
A process map is a powerful tool for understanding, improving, and communicating how to complete work. To create an effective one, consider the following best practices:
Engage all stakeholders: Every person who uses the process should contribute their perspectives during the creation process. Stakeholders can help you break down tasks into subtasks and point out where gaps might exist. This ensures that your process map is usable and effective.
Use consistent notation: Most companies stick to standardized symbols for process maps, like arrows to indicate directional flow. These methods are tried-and-true, and employees may already be familiar with them from their work at previous companies. If you do need to stray from standard notation, make sure you use the same shapes and symbols across all of your process maps to ensure consistency.
Keep it simple: The aim of creating a process map is to provide stakeholders with a quick visual reference point. Avoid adding unnecessary clutter, such as lengthy explanations, that might distract from the main points of your map. At the same time, don’t oversimplify the process itself. Add as many steps and substeps as you need to illustrate it accurately.
Map before making improvements: It may feel like extra work to map a process with all of its inefficiencies and bottlenecks when you know that you need to make changes. But for best results, you should map a process’s as-is condition first. This helps you fully understand the ins and outs of the process so you can make thoughtful improvements.
Choose the right tool to create your process map
Before you begin, select an easy-to-use process management and mapping tool for better adoption. Tools like Nintex Process Manager offer a simple user interface (UI) with drag-and-drop functionality so anyone on your team can contribute to a map.
With Nintex Process Manager, you can also:
- Automate the processes you create to increase your efficiency
- Eliminate paper-based processes to reduce costs and save time
- Send automatic notifications about process changes to facilitate change management
Learn how you can map your end-to-end processes with Nintex.