If you’re like me, when you first heard the term “Beacon,” you wondered what it was.
A Beacon is an action control in Nintex Workflow that can be placed anywhere in the workflow to capture specific data. With this action, you can emit additional data from a workflow for a Process Intelligence Lens report.
How to Begin
- Once you have configured your data source in Nintex Analytics, you can now officially begin adding Beacons inside the Nintex Workflow designer.
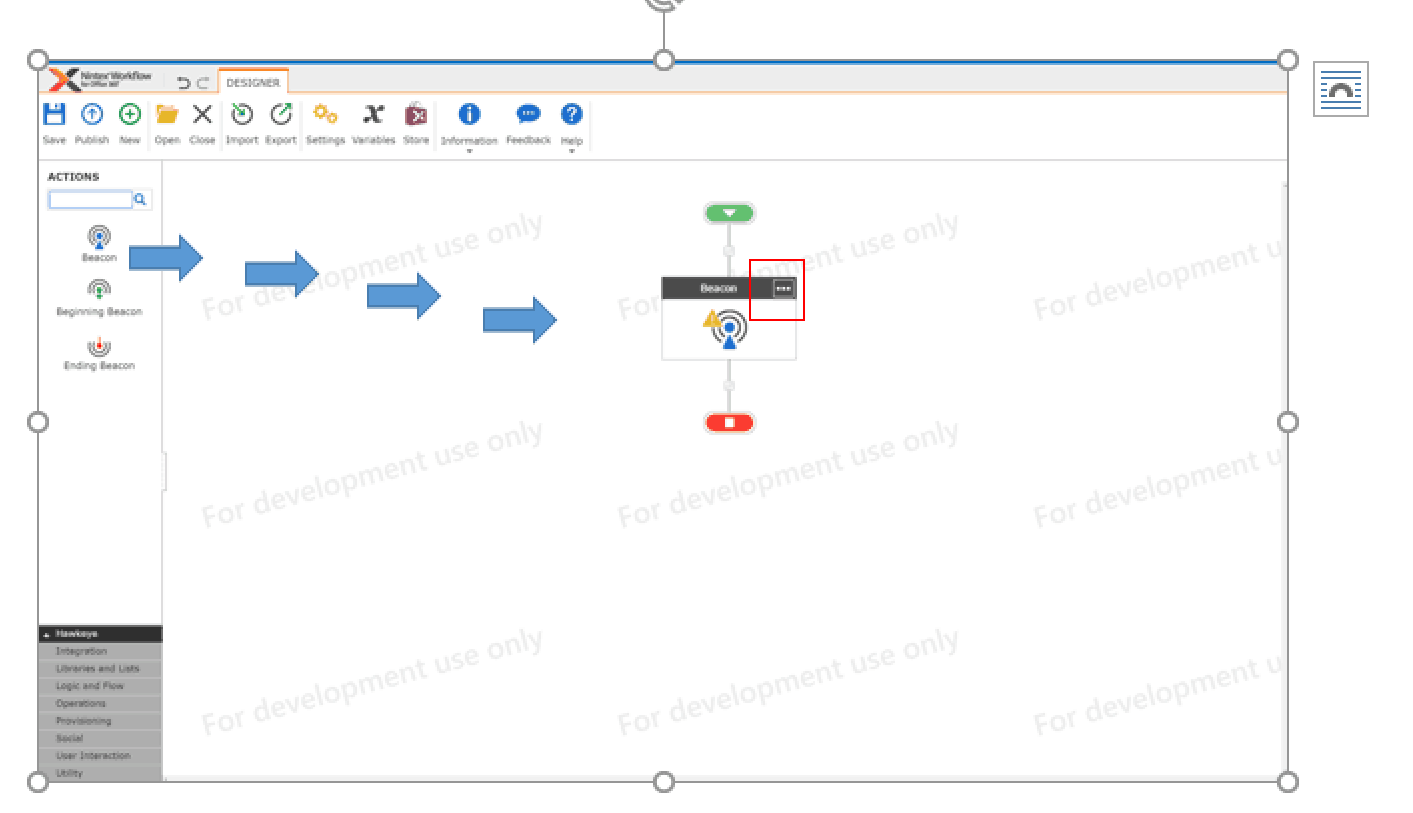
- Go to Nintex Workflow and search for “Beacon.” Drag the first control (Beacon) to the workflow canvas.
- To configure this Action Control, you can double-click the control or single click on the ellipsis (…)
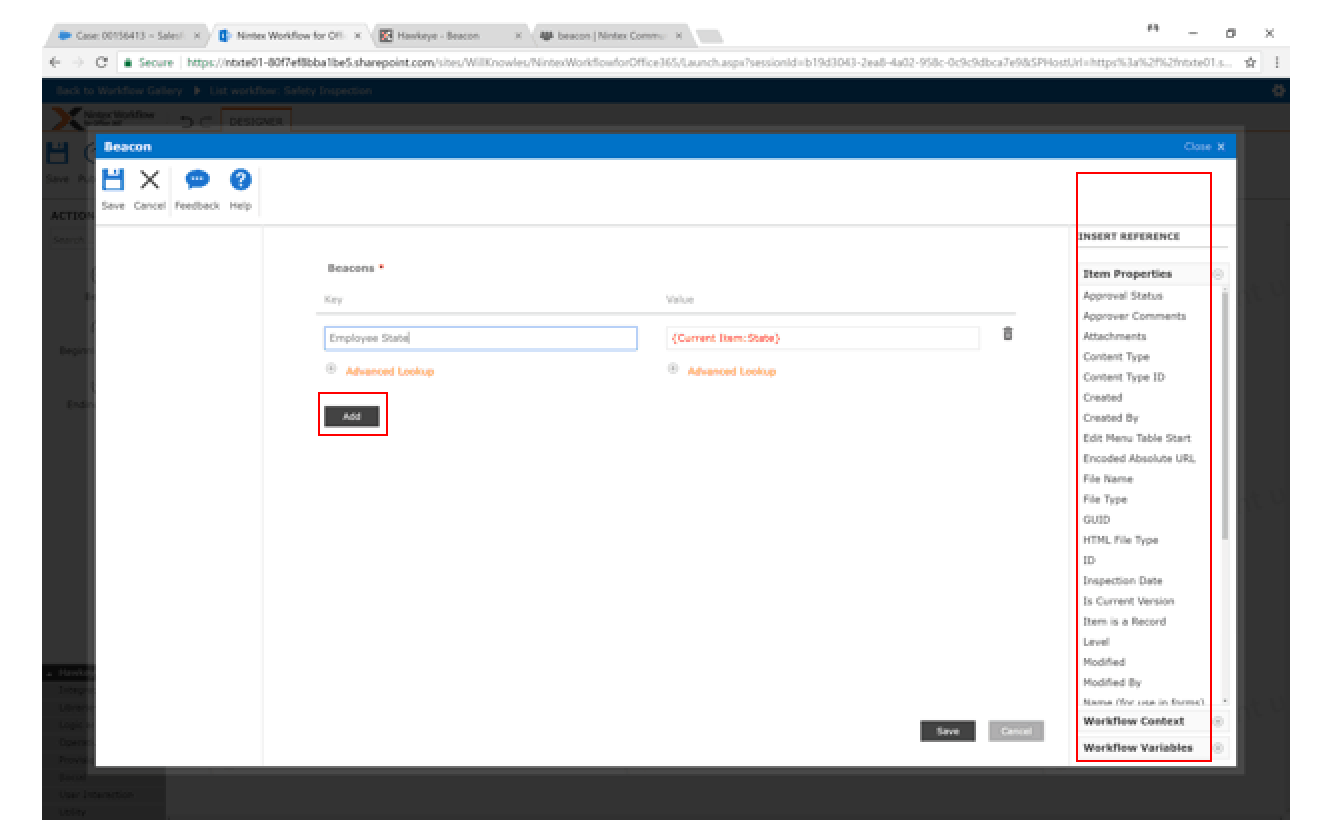
- Now let’s set our variables as in the example below. For Key you can type a specific name or Insert Reference (right side of the page). The same applies to Value.
- You can add as many Beacons as you like. To add more, select the Add button.
- When you have finished configuring your Beacon, hit the Save button.
- Your Beacon Action Control is now configured.
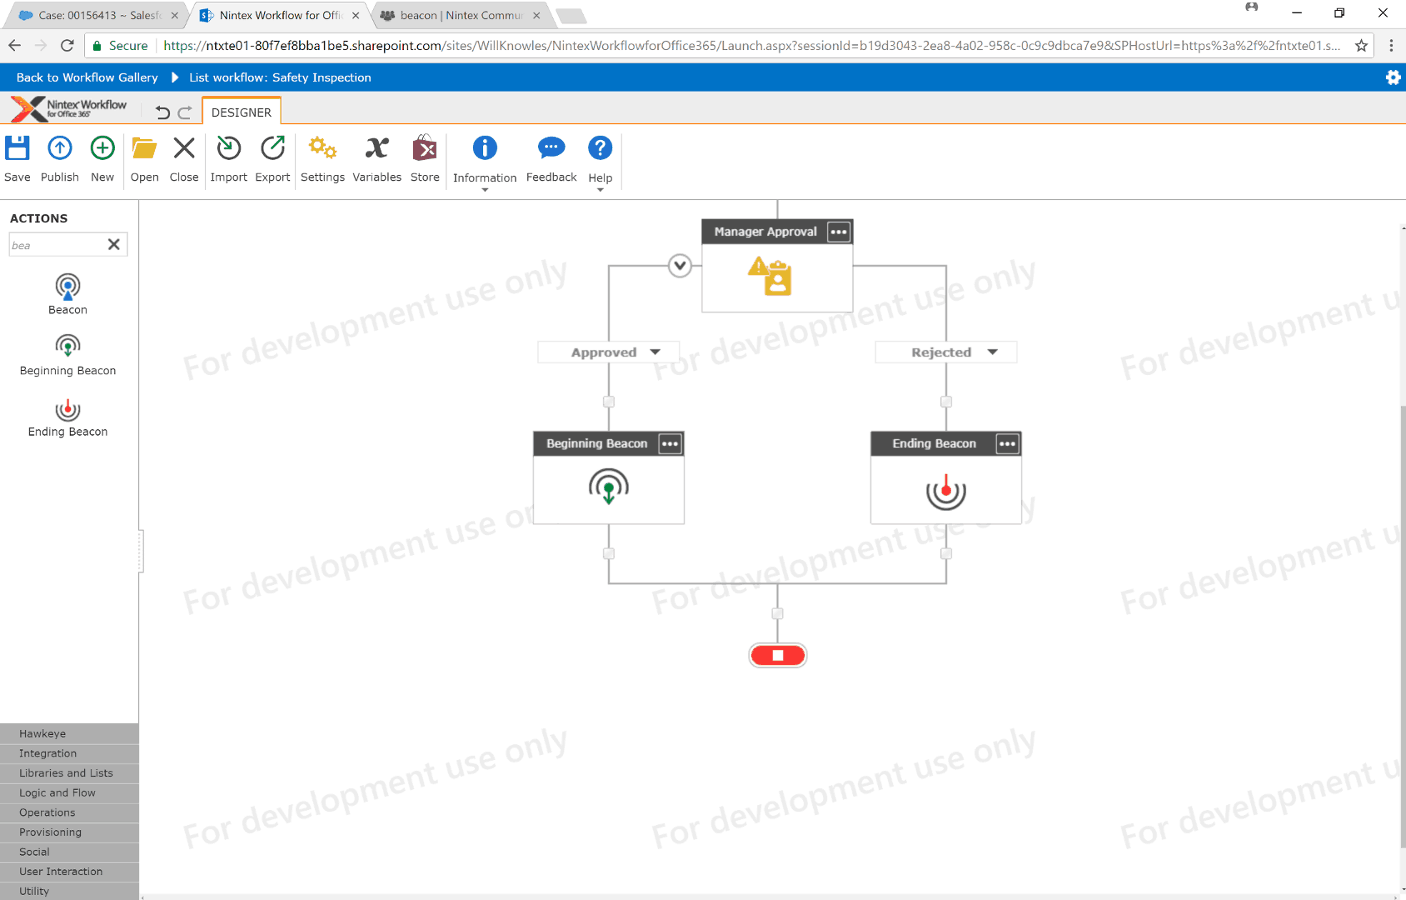
- There are two other Beacon Action Controls to mention:
- Beginning Beacon: Logs the start of a process stage with Nintex Analytics.
- Ending Beacon: Logs the end of a process stage with Analytics.
- Drag and drop both Action Controls to the workflow canvas.
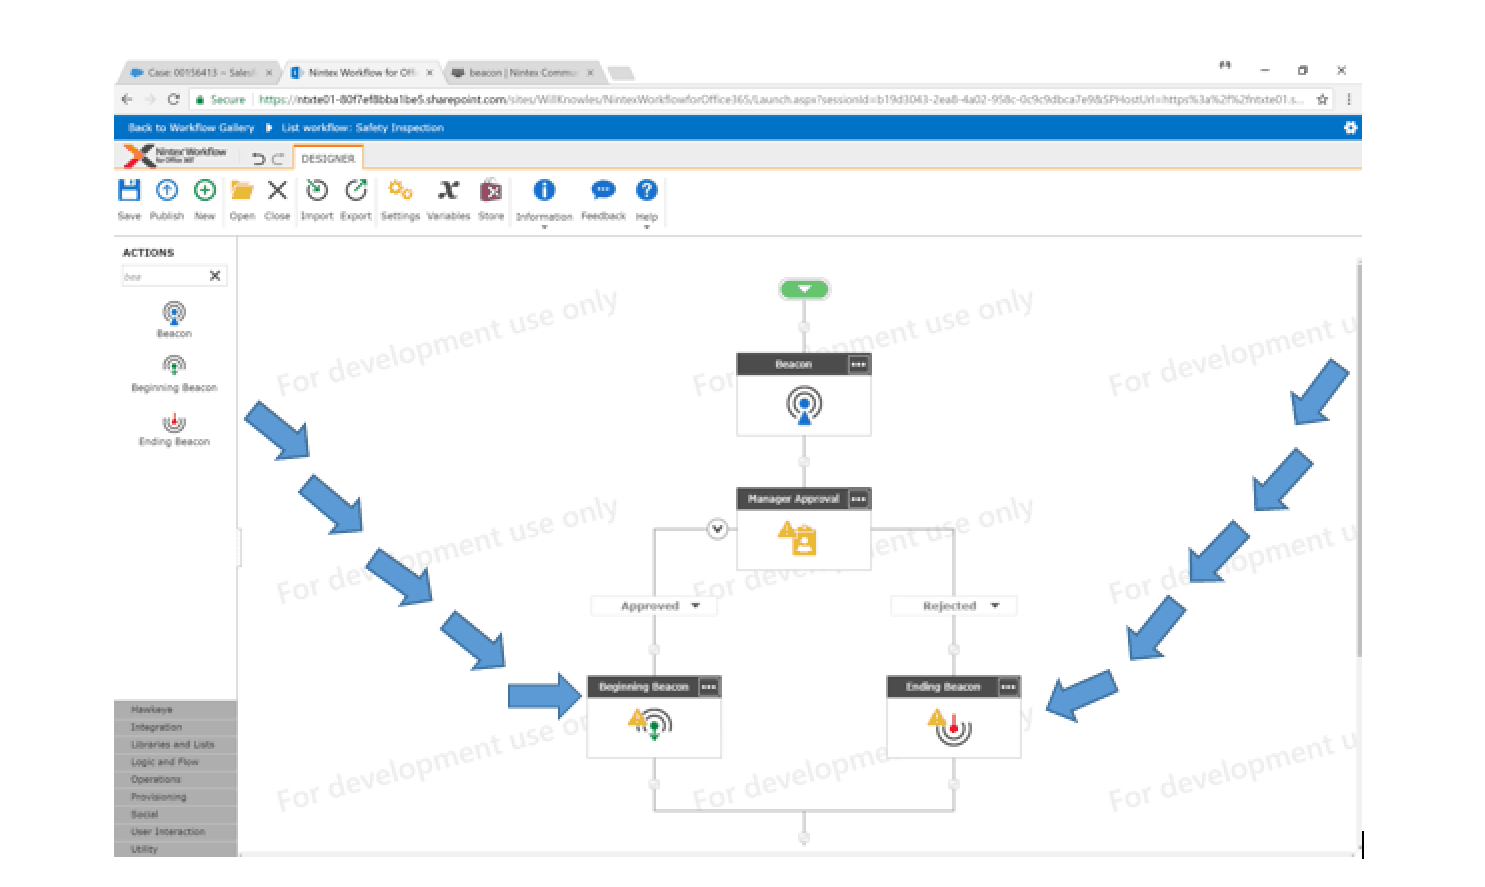
- To configure this Action Control, you can double-click the control or single click on the ellipsis (…)
- For Stage Name, you can type a specific name or Insert Reference (right side of the page).
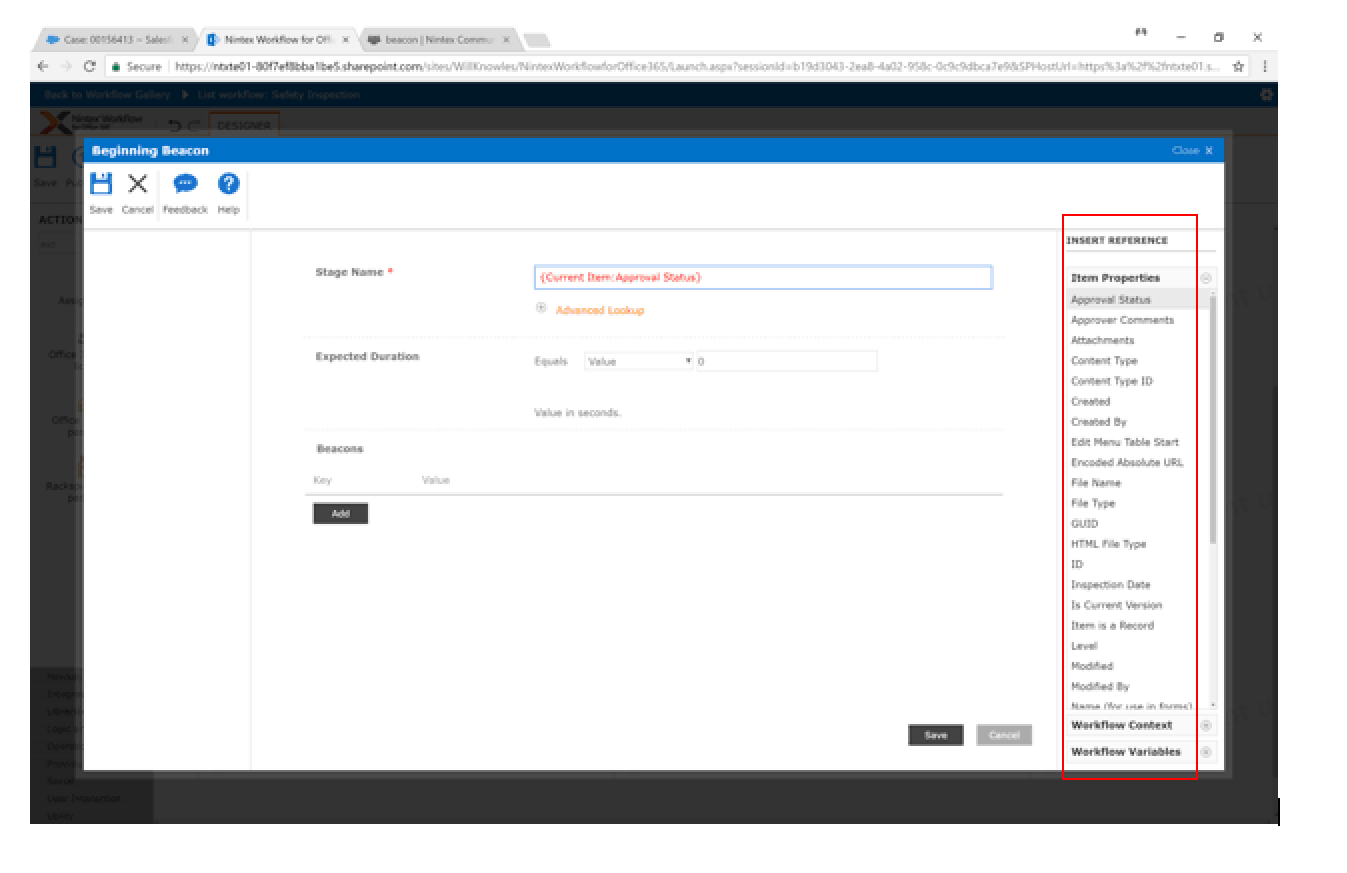
- When you have finished configuring your Beginning Beacon, hit the Save button.
- Your Beginning Beacon Action Control is now configured.
- Repeat the same configuration steps for the Ending Beacon Action Control.
Visit the Nintex Community today to learn more and engage in conversations with fellow Nintex users!


