
Hello again! Last week we shared why Skuid customers should migrate to v2. This week we’ll be talking about how to do just that.
If you have simple v1 pages (no complicated Javascript or CSS, no custom components, no page includes), then this migration utility is probably all you need to get your page conversion 90% complete.
However, if you’re like us and you have a multi-page app with custom components, CSS, lots of Javascript snippets, and also, page includes that share resources with the main page, then you might be wondering, is this possible?
It is, and this series will help you through it.
Plan your migration
The application we’re using as an example is a configure, price, and quote (CPQ) experience, built in v1. It’s a complex four-page app that helps a salesperson select products, price them, and generate a printable quote. When we audited all the pages, here’s what we had:
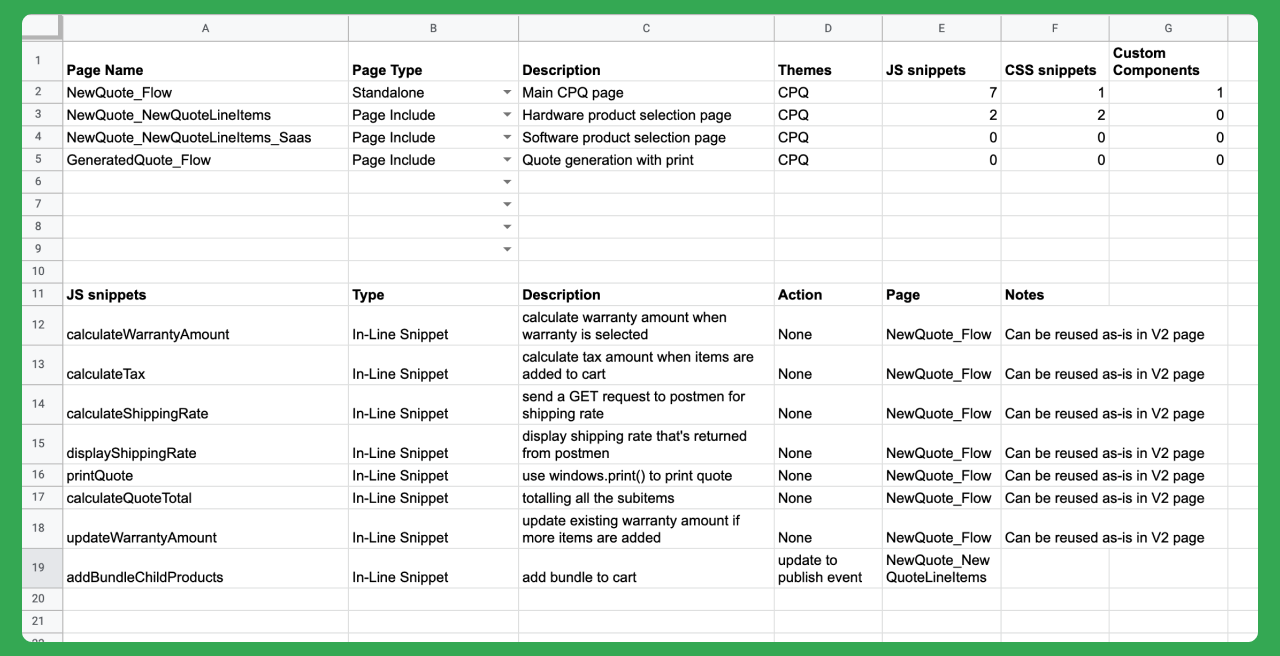
We created a template for this audit sheet that you can use here (if you’re an Excel user, after clicking USE TEMPLATE, go to File > Download to get your own version).
Based on the number of pages and customization in your app, you may now have a better idea of how much effort and time migration may take. To help you plan your migration work accordingly, use this checklist we created for my migration project.
Migrationchecklist
Today’s post will cover steps 1-5. We’ll discuss steps 6-8 in part 2.
- Read the migration utility guide
- Using the template above, audit all v1 pages that you want to migrate
- Create a design system
- Migrate pages in this order: Master pages, Page Include pages, Child pages
- Apply styling variants and adjust spacing
- Migrate JavaScript snippets
- Migrate custom components
- Deploy pages
Create a design system
After you’ve read the migration utility guide and audited all the pages in the app, it’s time to create a design system for the converted pages. We recommend you do this step first because a design system is foundational to anything you’ll build. It ensures consistency, which is critical for good user experience.
Besides, the migration process will ask you to choose a design system for your new pages. If you don’t want to create one from scratch, you can always select the default Ink design system and then change it later.
Whenever you do create your design system, it’s also helpful to document the decisions you’re making in a style guide page. This will help other colleagues better understand the structure and how it gets applied to elements in your apps. Check out this post about app styling and see what elements to consider for maintaining brand consistency.
More importantly, because of the way design systems are used, it’s better to create all the style variants you need in a holistic way than to add them one at a time. You can have the pages open in one browser tab, the design system in another, and create as many variants as you see. This way, you can complete a good portion of the design work, and when you migrate pages later, you can apply these variants wholesale.

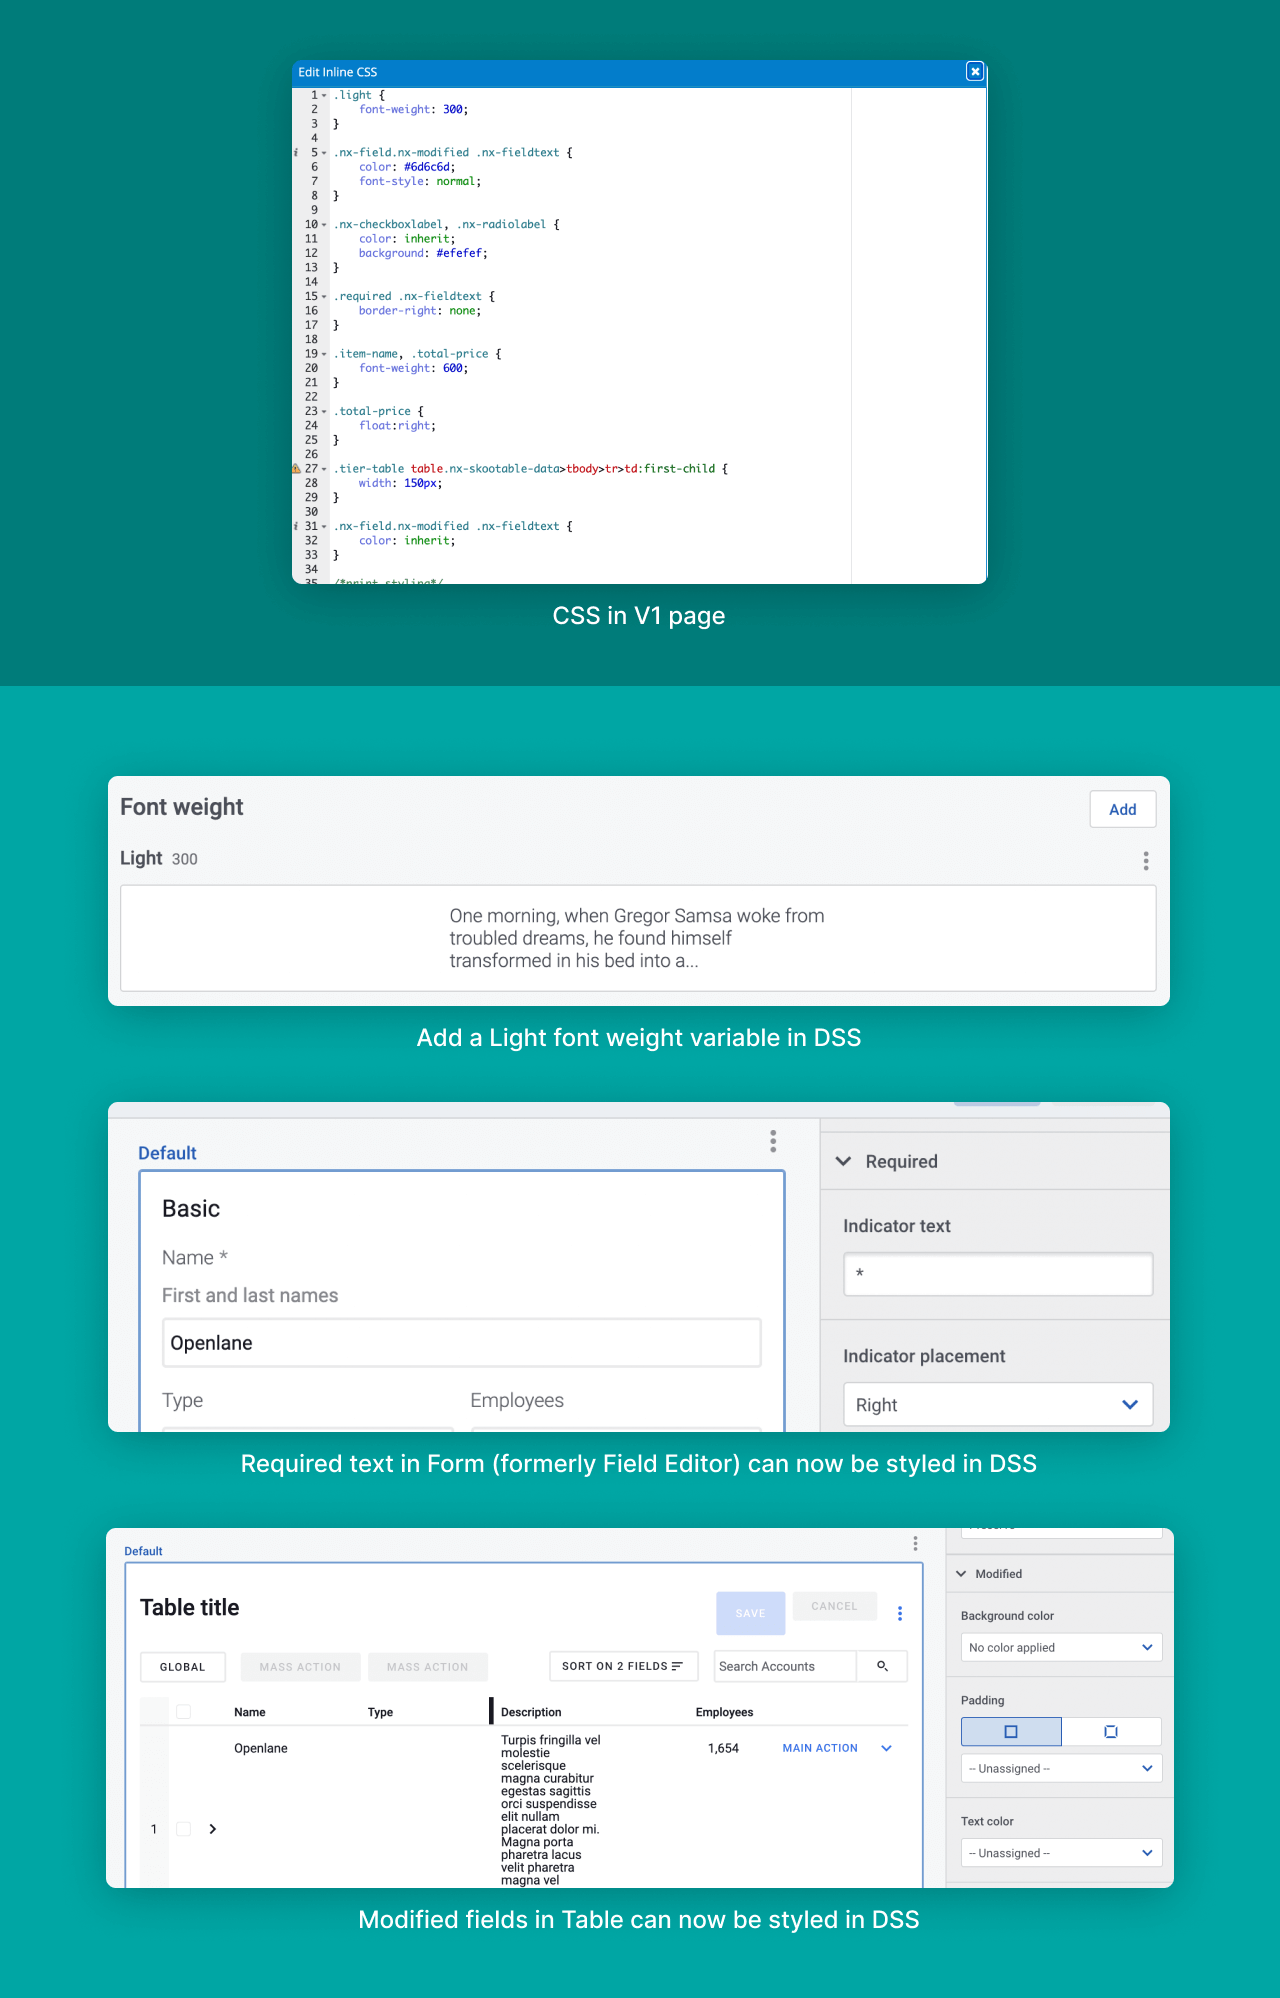
In our pages, we had quite a few CSS snippets requiring custom styling that wasn’t possible to do declaratively in v1 themes. With the v2 design system, we were able to eliminate all of those snippets because with Design System Studio, you can create unlimited style variants. If you’re not yet familiar with Design System Studio, this would be a great time to start exploring. See how much more you can do with it, and how much CSS you could end up eliminating.
Migrate pages
After you create the design system for the app (or use Ink as the default), it’s time to migrate your pages. Using the migration utility tool, we were able to quickly migrate all four pages of the CPQ app. Because we have three Page Includes, we needed to go back to the main page and update their references to make sure they were using the v2 version. All in all, this step was pretty straightforward thanks to the migration utility tool!
Apply styling variants and adjust spacing
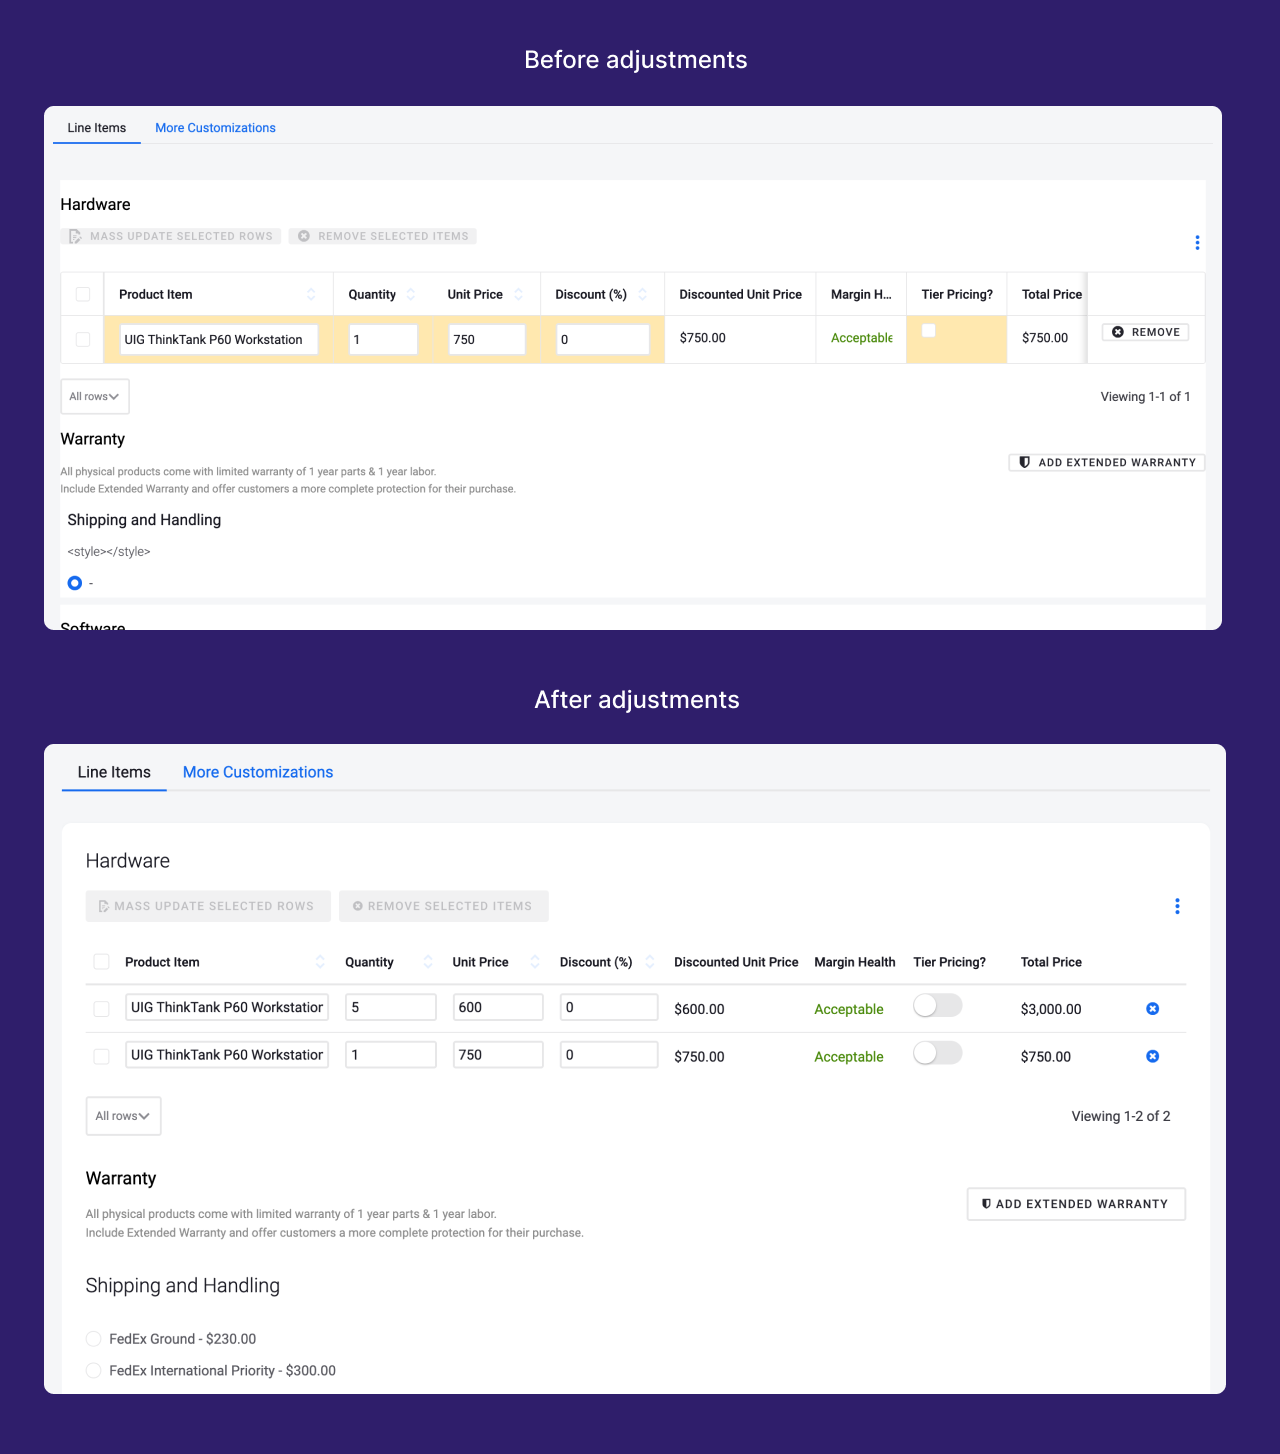
On previewing the pages immediately after conversion, they weren’t looking so great right away. That’s because we hadn’t adjusted the spacing, the image sizes, and applied any of the new style variants to our components. Just a warning, this step can take a while. Since the app has a very specific look and feel to it, we needed to make sure all the small styling elements were present and matched the v1 version.
If you have the flexibility of not having to match your v1 app exactly, we recommend using this process to improve the UI/UX design of your app.
Instead of duplicating, think about making it better, or creating a design system for the v2 version that will scale and work well for your app moving forward. That’s what we love about a design system: it’s not just a theme, it’s a live, ever-evolving structure that represents your branding.
We cover the last three steps of the checklist in the next blog post, so check it out! We’ll dive deep into the technical details of page migration, like handling page includes that share resources (models, JavaScript snippets, etc.) or re-creating your custom components in v2. Migrating JavaScript snippets and custom components can be tricky, but we’ll provide tips and tricks on how to help make the process easier.